In building out my workshop, I was tired of setting up sawhorses the garage and realized that I needed to better use the floor space of my shop. Setting up a 4×8 workbench is a right of passage for the aspiring maker. They are quick to make and super useful.
Most of them are pretty simple:
Some are just epic:
My main goal was to make an outfeed table and a common surface to cut with my festool track saw. I also wanted a cabinet makers vice and a holddown system based on t-tracks or MFT hardware.
I went with t-tracks and these clamps and these tracks. These have been incredible and I use them with nearly every project. Initially, I bought these intersection kits, but found I could use my miter saw with the right blade to cut all the intersections.
I was initially excited about making the top out of Valchromat, but the pain of sourcing that in a covid19 enviornment was too much of a stretch and I settled on Home Depot MDF for the top. To be able to swap out the top, I glued everything but the top which I used about 10 pocket screws to attach.
I was inspired by April Wilkerson to build the workbench completely out of plywood with pocket screw joinery and I’m really glad I did. I needed the workbench to be mobile and incorporated a Workbench Caster kit that retracts to give me the benefit of firmly planting the workbench to the ground. Unlike other designs, I planned for the bottom base of plywood to directly touch the ground, since I didn’t see a benefit to having space underneath the table and I wanted 100% rock solid surface.
Before building the design I came up with the following requirements:
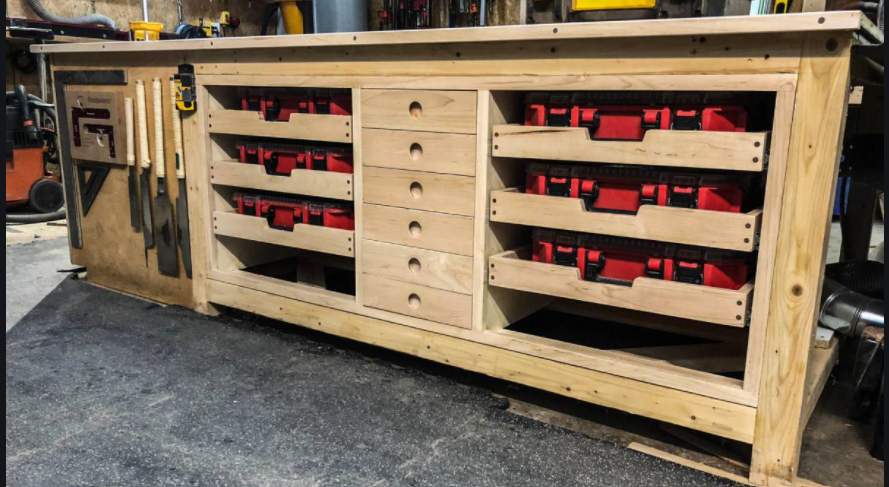
- Important storage needs were for my spare wood, my growing collection of jigs and saw blades and framing supplies.
- Storage for:
- store foam for framing (30X40 acid free mat boards)
- saw blades and push sticks
- Festool tracks (The rail is 183mm wide, plus additional 2-3mm plastic lip)
- My large and small T-squares
- All my small parts bins
- Spare wood
- The surface needed to be covered with t-tracks for easy workpiece clamping or MFT (pattern of holes 20 mm in diameter, and are spaced 96 mm center to center) (I chose t-tracks)
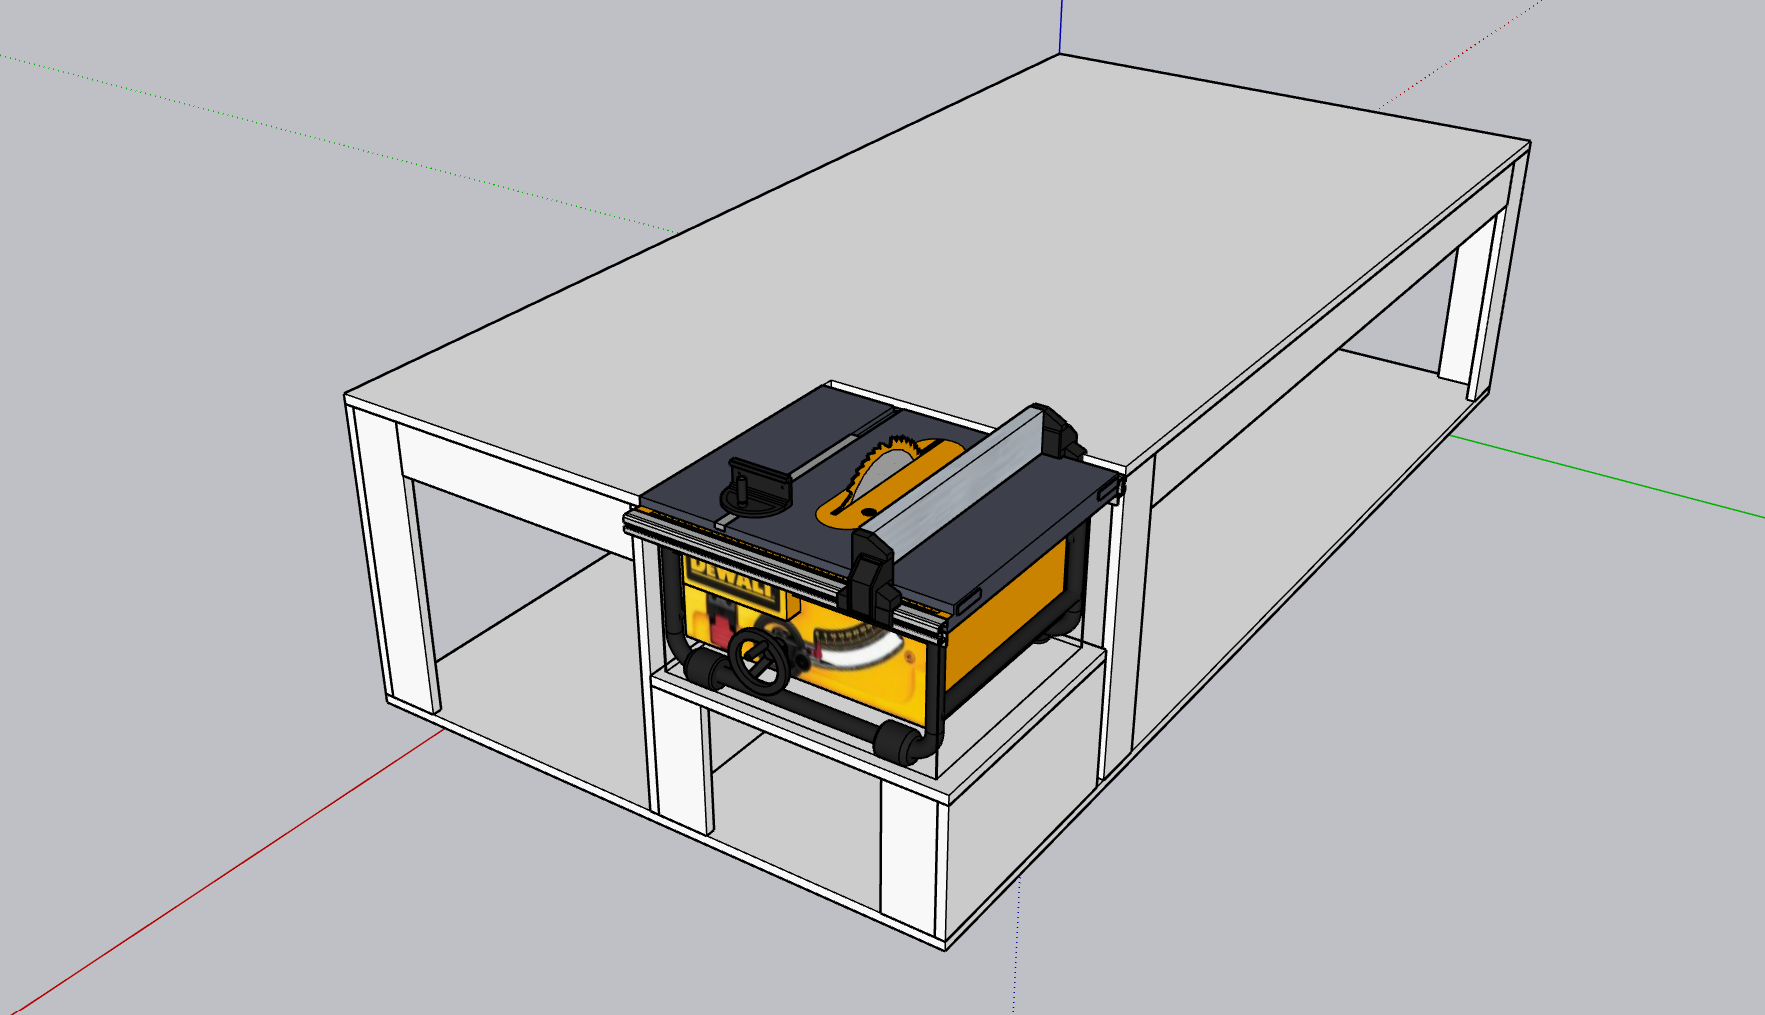
The sole complication of my design was incorporating my table saw that wasn’t meant to be surrounded by plywood. The goal of the design was to save a lot of space and provide me an outfeed table, but getting the top flush and level was challenging. (I had to use my car jack and shims.) The most difficult part was cutting out the voids for the guide rails and the lever for the riving knife. This was really hard because both of them intersected the tabletop so I had to use a router and a chisel to carve space out of the tabletop. I was inspired from others who built similar designs, but I thought I could signifcantly improve on them.

To get me thinking through my design, I did a quick design in Sketchup.
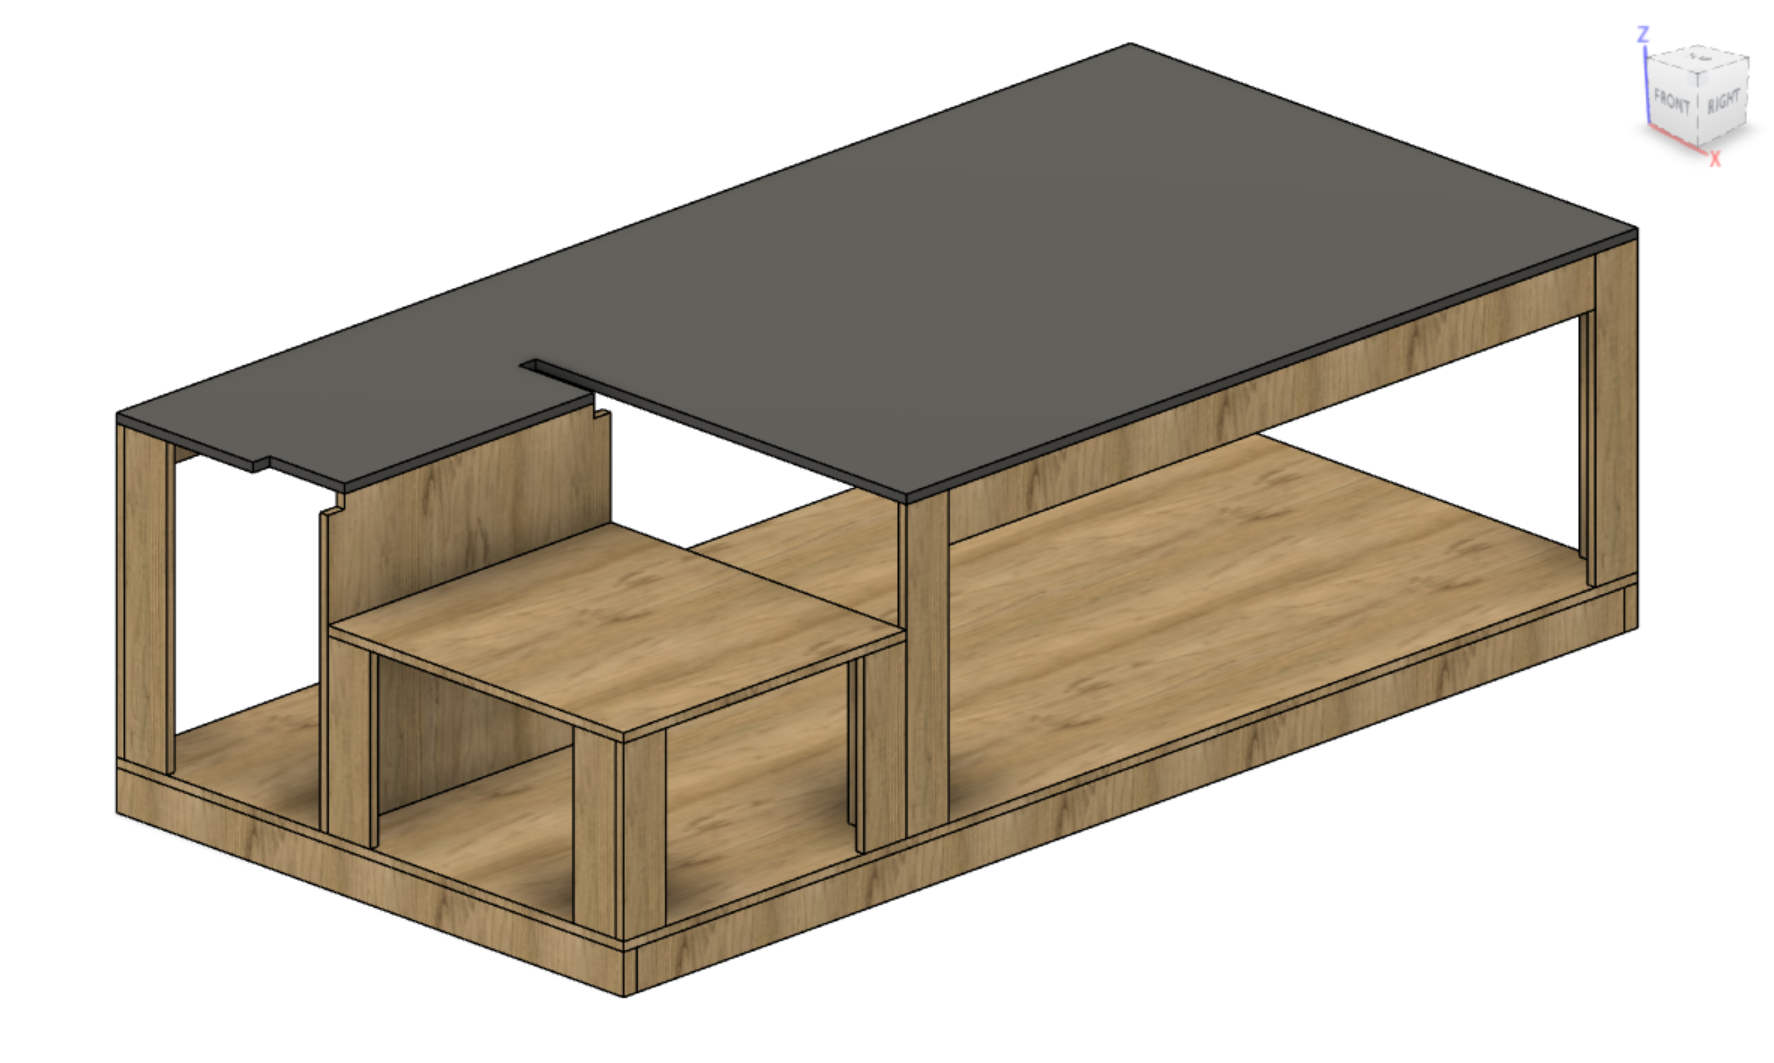
Once it was time to get serious, I used Fusion 360 to build a refined design. Fusion 360 (free for hobby folks) uses parametric modeling which gives me the ability to modify the model as I take measurements. One of the important impacts of parametric design is the ability to keep tweaking the design as I optimize cutting out of the plywood. Also, I can start designing without measurements, and in this case I did most of the design in the car on the way home from the beach.
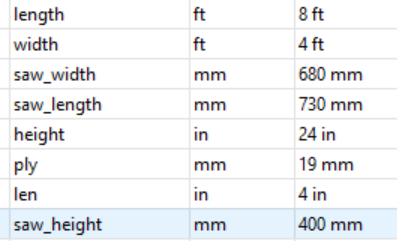
Once home, I was able to get some key measurements:
Fusion 360 is a serious modeling solution and I added more detail, like the ability for the fence to go to the left of the saw.
For all joinery, I used Kreg pocket screws with 2.5 inch cabinet screws. I tend to like McFeely\’s and square drive, but Home Depot is so much easier, and they store GRK Fasteners with star drive heads that don\’t strip.
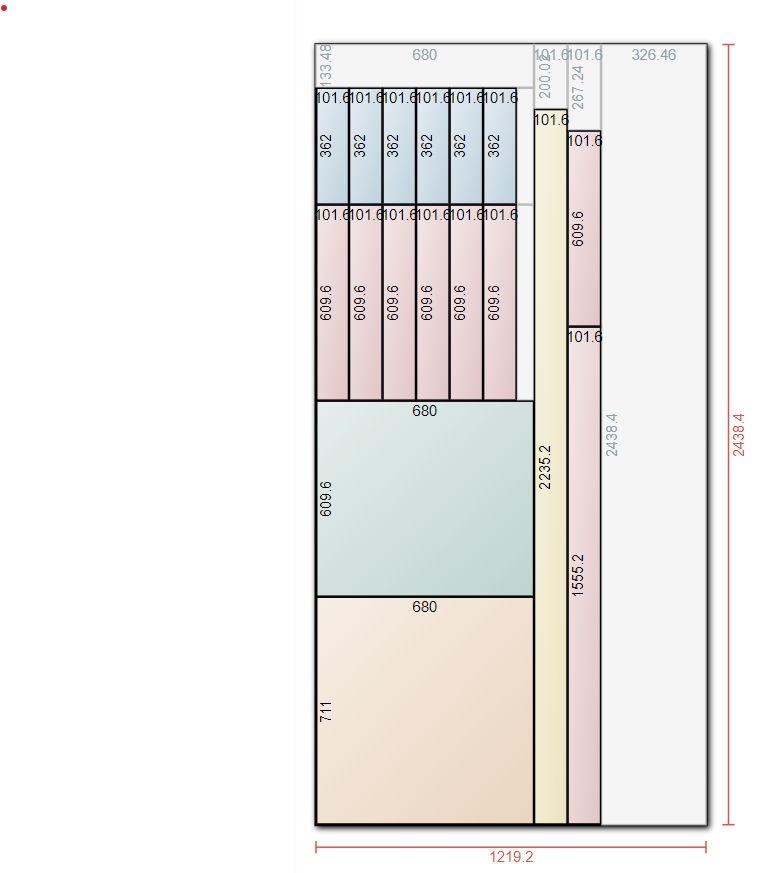
One of the best features of Fusion 360 is the Map Boards Pro extension that allows to generate a cut-list and creates all the relevant bodies as a flat-pack.

This gets me a rough feel of all the boards I need to cut, then I like to use cutlist optimizer which is easy because I just upload the cutlist exported from MapBoards pro.
Mistake
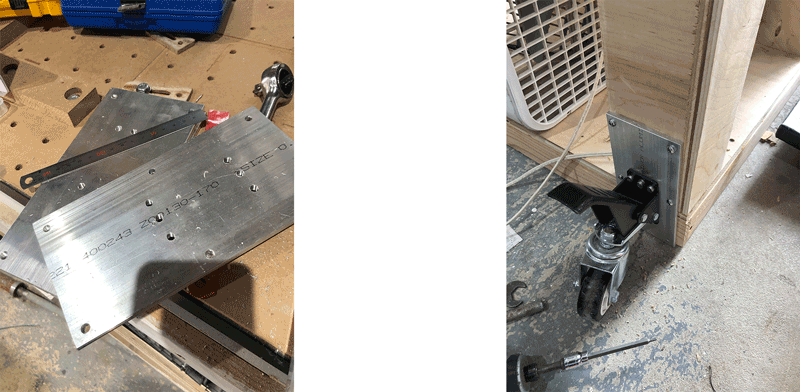
The casters were perfect and rated for 880 lbs each, but the bottom screws couldn’t hold the weight and ripped out of the workbench. More engineering was needed!
I designed a flat plate of aluminum (1/4 inch thick) in which I would tap M5 threads (5mm hole) to bolt the casters into. I made six other holes 5.5mm in diameter for longer m5 bolts that would allow me to bolt them on from the back.
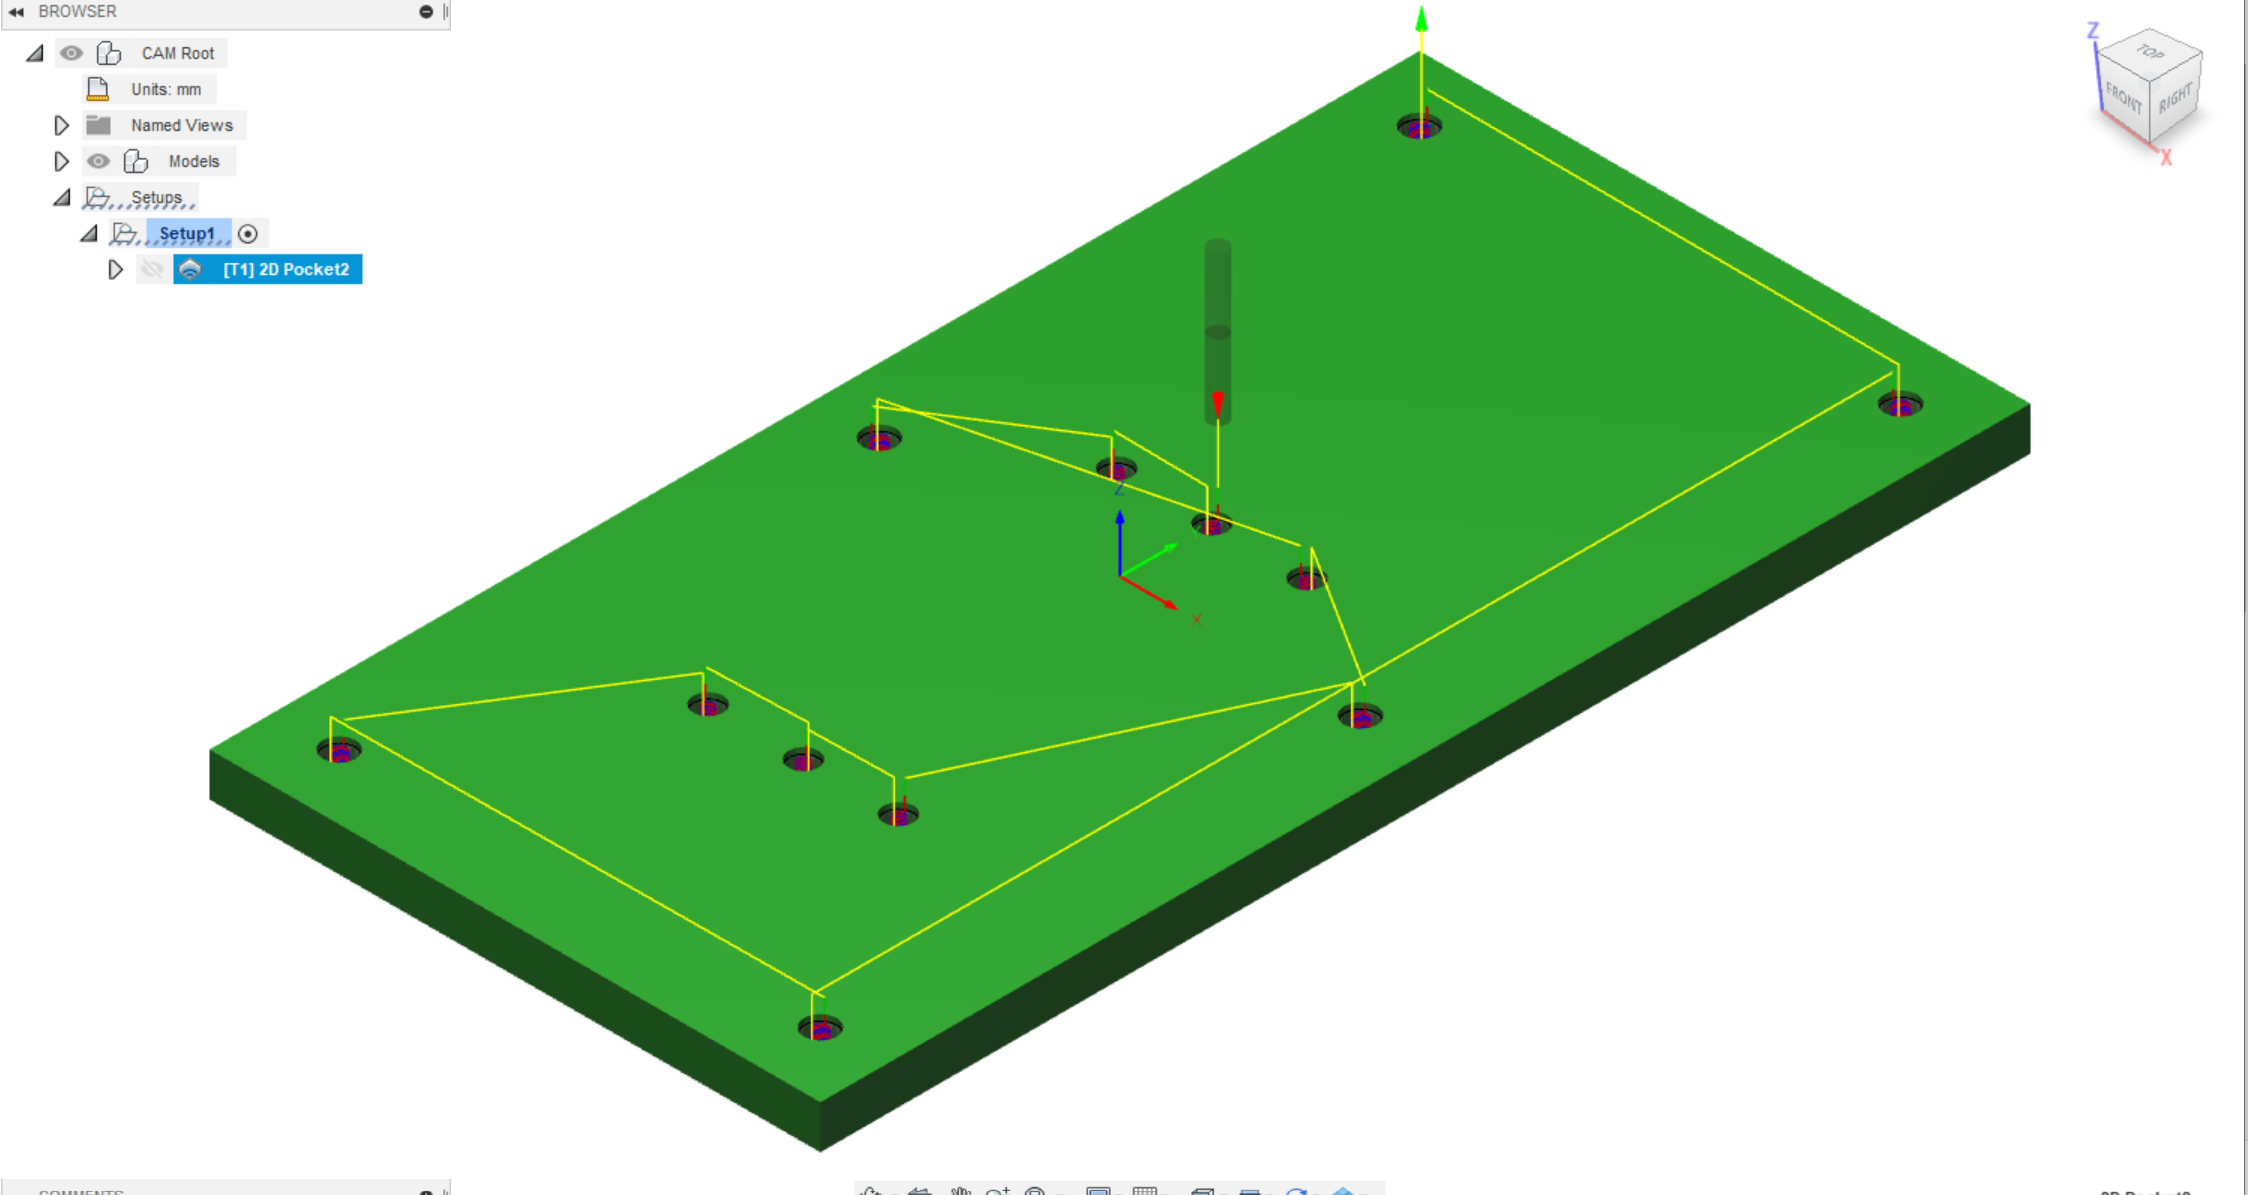
I purchased four Aluminum Flat Bar, 1/4″ x 4″, 6061 General-Purpose Plate, T6511 Mill Stock, from Remington Industries and used my Shapeoko CNC to cut the first 4 mm but I finished them off with special drill bits on my drill press so I could ensure highly accurate hole diameters. To cut the aluminum on the CNC, I used Kodiak Cutting Tools KCT166406 1/8 End Mill. I was cutting a 5 mm holes using 10k rpm with a feed rate of 500 mm/min and plunge of 120 mm/min for a boring operation in fusion 360 with a pitch of 0.5 mm.
Working with metal is just awesome, for one it helps me claim I’m an engineer and maker more than a woodworker only.
For reference, I was able to use
this site for hole sizes and this tap and die set.
Mistake #2
In tapping the threads for the M5 bolts, I used the fine pitch tap (0.75 mm pitch) not the 1mm pitch I should have. This was a problem since you can’t easily find fine threaded bolts. Thank you McMaster Carr for saving me out of this one.
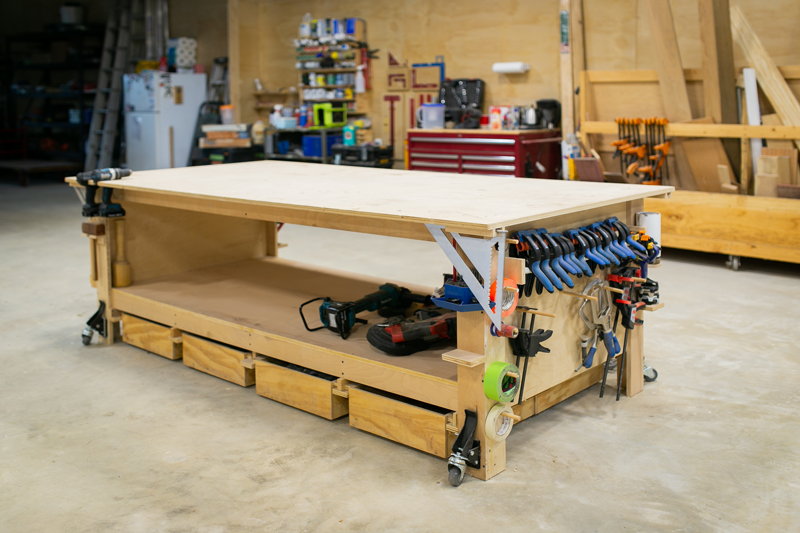
Finished Product
Seriously, this was a super fun project that came together exactly as planned. The t-tracks and clamps are my favorite feature, but I love the huge storage for framing supplies. (I love making custom canvases and frames.)
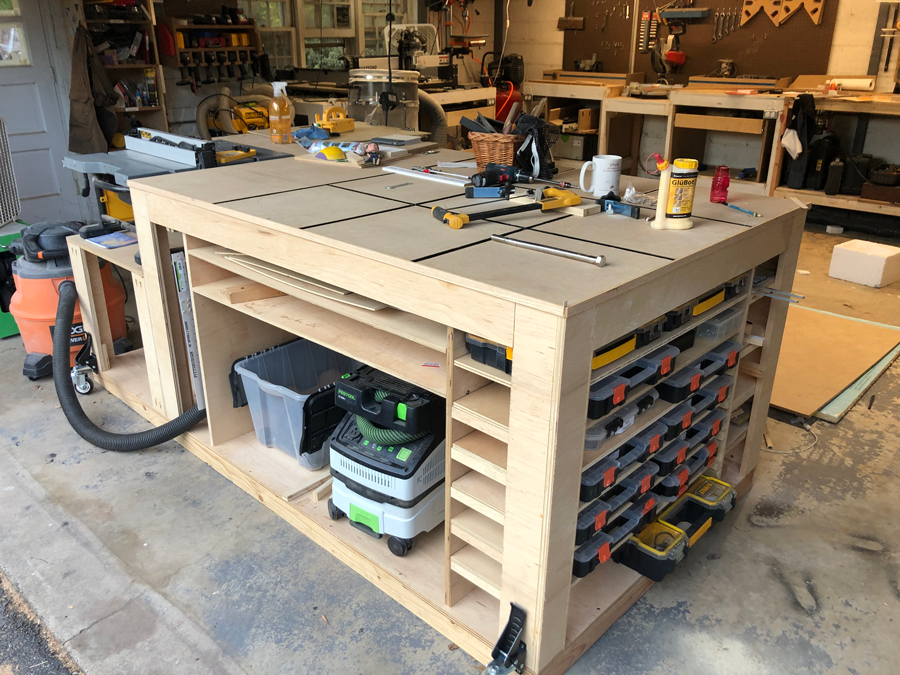
The metal supports for the casters at the bottom worked out really well.